Tag: howto
-
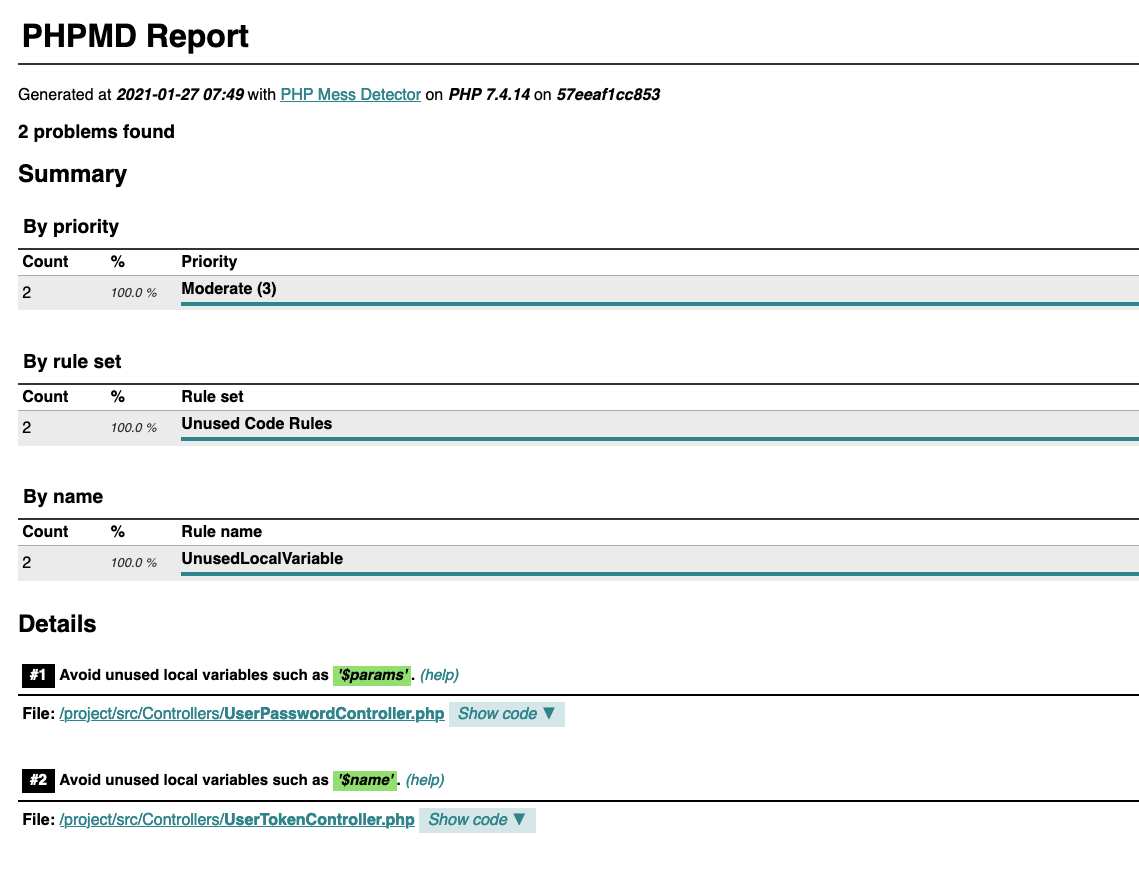
Running static analysis tools for PHP
We all write bug free code but analyzing your code is still important part of software development if for some reason there could’ve been some mishap with typing. Here’s a short introduction how to run static analysis for PHP code. Static analysis tools for PHP The curated list of static analysis tools for PHP show…
-

Generating JWT and JWK for information exchange between services
Securely transmitting information between services and authorization can be achieved with using JSON Web Tokens. JWTs are an open, industry standard RFC 7519 method for representing claims securely between two parties. Here’s a short explanation and guide of what they are, their use and how to generate the needed things. “JSON Web Token (JWT) is…
-

Best Practices for Version Control in 8 steps
Using version control is an essential part of modern software development and using it efficiently should be part of every developer’s tool kit. Knowing the basic rules makes it even more useful. Here are some best practices that help you on your way. tl; dr; Commit logical changesets (atomic commits)Commit Early, Commit OftenWrite Reasonable Commit…
-
Using Apache for proxying connections to Crucible
Atlassian’s web applications are great tools for software development and they are relatively easy to setup because they come with Jetty servlet container and HQSQL database. You only have to install Java. Some of the applications can be also run like any normal deployable WAR-packaged web application for example with Apache Tomcat which gives you…
-

Using Let’s Encrypt SSL certificates on Centos 6
Let’s Encrypt is now in public beta, meaning, you can get valid, trusted SSL certificates for your domains for free. Free SSL certificates for everyone! As Let’s Encrypt is relatively easy to setup, there’s now no reason not to use HTTPS for your sites. The needed steps are described in the documentation and here’s short…
-
Patching RichFaces 3.3.3 AJAX.js for IE11
Couple of years ago I wrote about patching RichFaces 3.3.3 AJAX.js for IE9 and as the browser world has moved on, it’s now time to patch RichFaces 3.3.3 AJAX.js for Internet Explorer 11. Of course you could update your web application to JSF 2 and RichFaces 4 or PrimeFaces but it’s neither trivial nor free.……
-
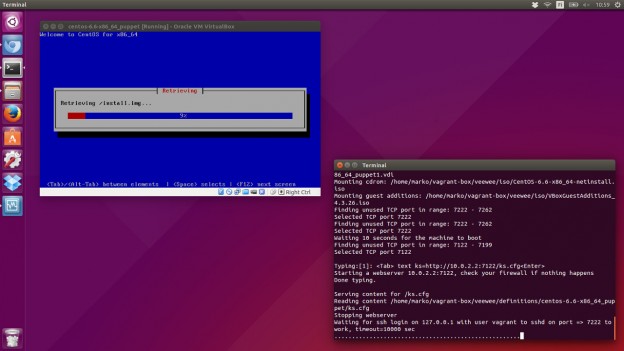
Creating Vagrant Base Box with Veewee
Vagrant is a great tool for creating and configuring lightweight, reproducible, portable virtual machine environments but the first step for using Vagrant, downloading an existing “base box”, raises some questions. E.g. How are these unverified boxes built? So, you might end up building your own base box which is often time consuming and cumbersome.… Jatka…
-
Disabling Derby in Oracle WebLogic 12c
Oracle WebLogic has some interesting traits to help developers frustrate. From Weblogic 10.3.4 and above the Apache Derby Database is included in the installation. That’s fine but from 12.1.2 release it also starts automatically which is usually unwanted, useless and waste of resources. Previous versions of WebLogic didn’t automatically start the Derby database.… Jatka lukemista…
-
Transferring Linux install media to USB thumb drive
Optical drives are nowadays less common on laptops which makes making bootable install medias a little easier. Yes, easier by requiring you to use USB thumb drives. There are different ways to achieve what you want and here is couple of examples how to transfer Linux install media to USB thumb drive on Windows and…
-
Do a clean install of Windows 8 with an upgrade key
There are times when you have to do a clean install of your Windows 8 but if you have just an upgrade key you need to make couple of extra hoops before you can activate the new install. The upgrade key doesn’t prevent you installing to a clean disk but when you try to activate,…