Vagrant is a great tool for creating and configuring lightweight, reproducible, portable virtual machine environments but the first step for using Vagrant, downloading an existing “base box”, raises some questions. E.g. How are these unverified boxes built? So, you might end up building your own base box which is often time consuming and cumbersome. Fortunately there’s a tool called Veewee which aims to automate all the steps for building base boxes and to collect best practices in a transparent way.
Vagrant Base Box with Veewee
Veewee is a tool for easily (and repeatedly) building custom Vagrant base boxes, KVMs, and virtual machine images. You can use it to build a Vagrant box in Linux, Mac OS X and Windows but I found out that fulfilling the requirements on Windows is quite difficult (read Ruby and RVM) so just forget it.
To get you started there are some requirements you need to fulfill. First you’ll need to install at least one of the supported virtual machine providers like VirtualBox and second you need some development libraries.
On Ubuntu 15.04 Linux and using VirtualBox you need these packages:
$ apt-get install virtualbox git curl ruby ruby-dev libxslt1-dev libxml2-dev zlib1g-dev
Install RVM on Linux
For Ruby environment it’s recommended to use either rvm or rbenv. I chose the RVM and followed the RVM install documentation.
Install mpapis public key:
$ gpg --keyserver hkp://keys.gnupg.net --recv-keys 409B6B1796C275462A1703113804BB82D39DC0E3
if keyserver fails, you can use $ curl -sSL https://rvm.io/mpapis.asc | gpg --import -
Install RVM stable with ruby:
$ \curl -sSL https://get.rvm.io | bash -s stable --ruby
Installing Veewee with RVM
With RVM already installed, ensure a ruby version that’s supported by Veewee is available on your machine:
$ source /home/marko/.rvm/scripts/rvm
$ rvm install ruby
Clone the veewee project from source:
$ cd
$ git clone https://github.com/jedi4ever/veewee.git
$ cd veewee
Set the local gemset and ruby version within the current directory:
$ rvm use ruby@veewee --create
Run bundle install to install Gemfile dependencies for your local gemset:
$ gem install bundler
$ bundle install
Bundle install will take some time.
Building Vagrant Box with Veewee
Veewee uses definitions to build new virtual machines and ‘definition’ is derived from a ‘template’ and preconfigured templates are found in templates/ folder. Veewee Basics explains how you can create your own customized definition.
For my customized Vagrant Box I decided to use Tommy Muehle’s definition as a template as it contained what I wanted. Simple CentOS 6.6. Box with Puppet. I just changed the localization to Finland and made it bigger for WebLogic use case in mind. My definition for Vagrant Box can be found in GitHub.
To use my definition just clone the repository for CentOS 6.6 Box, copy the “centos-6.6-x86_64_puppet” folder to definitions/ folder under Veewee and make your own changes if needed. After you’re done run:
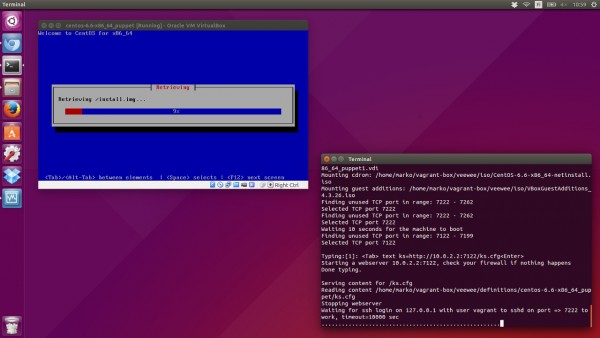
$ bundle exec veewee vbox build centos-6.6-x86_64_puppet
The build command runs Veewee scripts and automates the manual steps needed while installing a new Linux distribution.

To export the Box for further use with Vagrant, run:
$ bundle exec veewee vbox export centos-6.6-x86_64_puppet
The above command is actually calling “vagrant package –base ‘centos-6.6-x86_64_puppet’ –output ‘boxes/centos-6.6-x86_64_puppet’”. The machine gets shut down, exported and will be packed in a centos-6.6-x86_64_puppet.box file inside the current directory.
And you’re all done. Now you can use your just created base box for Vagrant boxes. Import it into Vagrant’s box repository and use it to initialize a fresh project:
$ vagrant box add 'centos-6.6-x86_64_puppet' 'centos-6.6-x86_64_puppet.box'
$ vagrant init 'centos-6.6-x86_64_puppet'
Using Veewee to build a Vagrant Box is simple and what’s more important it’s automated and reproducible. Using Ruby and RVM on Windows 7 turned out to be practically impossible but old ThinkPad W510 with Ubuntu 15.04 worked nicely. Of course you could create a base box with Vagrant way which means installing and configuring your Linux manually. But why would you want to that if you can just automate it?
Leave a Reply