-
Short notes on tech 24/2025
Security Secure by Design: Google’s Blueprint for a High-Assurance Web Framework“Learn about how Google has created and deployed a high-assurance web framework that almost completely eliminates exploitable web vulnerabilities.” (from CloudSecList #274) Common OAuth Vulnerabilities“A comprehensive guide on known attacks against OAuth implementations, together with a checklist that should prove useful for testers and developers…
-
Short notes on tech 8/2025
Software development The End of Programming as We Know ItGreat article for the topic of “software developers will soon lose their jobs to AI.” tl;dr; “I don’t buy it.” “When you watch a senior engineer work with AI tools like Cursor or Copilot, it looks like magic. They can scaffold entire features in minutes, complete…
-
Short notes on tech 40/2024
The holidays are long past and it’s time to get back to short notes. Software development On Being A Senior EngineerGreat article of what makes for a good senior engineer. Notes about time. Falsehoods programmers believe about time Storing UTC is not a silver bullet Web Design A (more) Modern CSS ResetOr use the archived…
-
Short notes on tech 29/2024
Backend Why, after 6 years, I’m over GraphQLWhy, after 8 years, I still like GraphQL sometimes in the right contextTo use GraphQL or not 🤔 Decide yourself and think about your use cases.(from Changelog news) Your API Shouldn’t Redirect HTTP to HTTPS“Instead of redirecting API calls from HTTP to HTTPS, make the failure visible.… Jatka…
-
Short notes on tech 22/2024
Integrating threat modeling with DevOps “Reflections on how it is possible to adopt threat modeling more effectively and efficiently, integrating it with modern DevOps methodologies and tools, and focusing on the value provided to all the various actors involved with the Software Development Lifecycle.” (from CloudSecList) Threat Modelling Cloud Platform Services by Example: Google Cloud Storage“A…
-
Short notes on tech 16/2024
DevOps Processing Background Jobs: Lambda vs ECS vs ECS FargateGood article of comparing where to run background jobs and costs. API observability fundamentalsA course on API observability, covering an introduction to OpenTelemetry as well as lots of API-specific topics. Programming Code Review Security Checklist“A few handy checklists for security focused code review, for both server…
-

Notes of Best Practices for writing Playwright tests
Playwright “enables reliable end-to-end testing for modern web apps” and it has good documentation also for Best Practices which helps you to make sure you are writing tests that are more resilient. If you’ve done automated end-to-end tests with Cypress or other tool you probably already know the basics of how to construct robust tests…
-
Short notes on tech 6/2024
DevOps Continuous Integration“An updated long-form post on continuous integration. Although not a new practice, it’s often misunderstood.” Embracing the Future: DevOps in 2024“Some predictions for Devops in 2024, focused on the continued move to the cloud, the importance of a security-first approach, AI/ML adoption and more.” Web Design and Accessibility 12 Modern CSS One-Line Upgrades“Sometimes,…
-

Recap of 2023
Short recap of writings in 2023: 12 blog posts, 7 of them short notes. I managed to write couple of more detailed post and here’s my favorite ones of them with short recap. Notes from axe-con 2023: Building accessible experiences My notes from axe-con 2023 which is world’s largest digital accessibility conference.… Jatka lukemista →
-
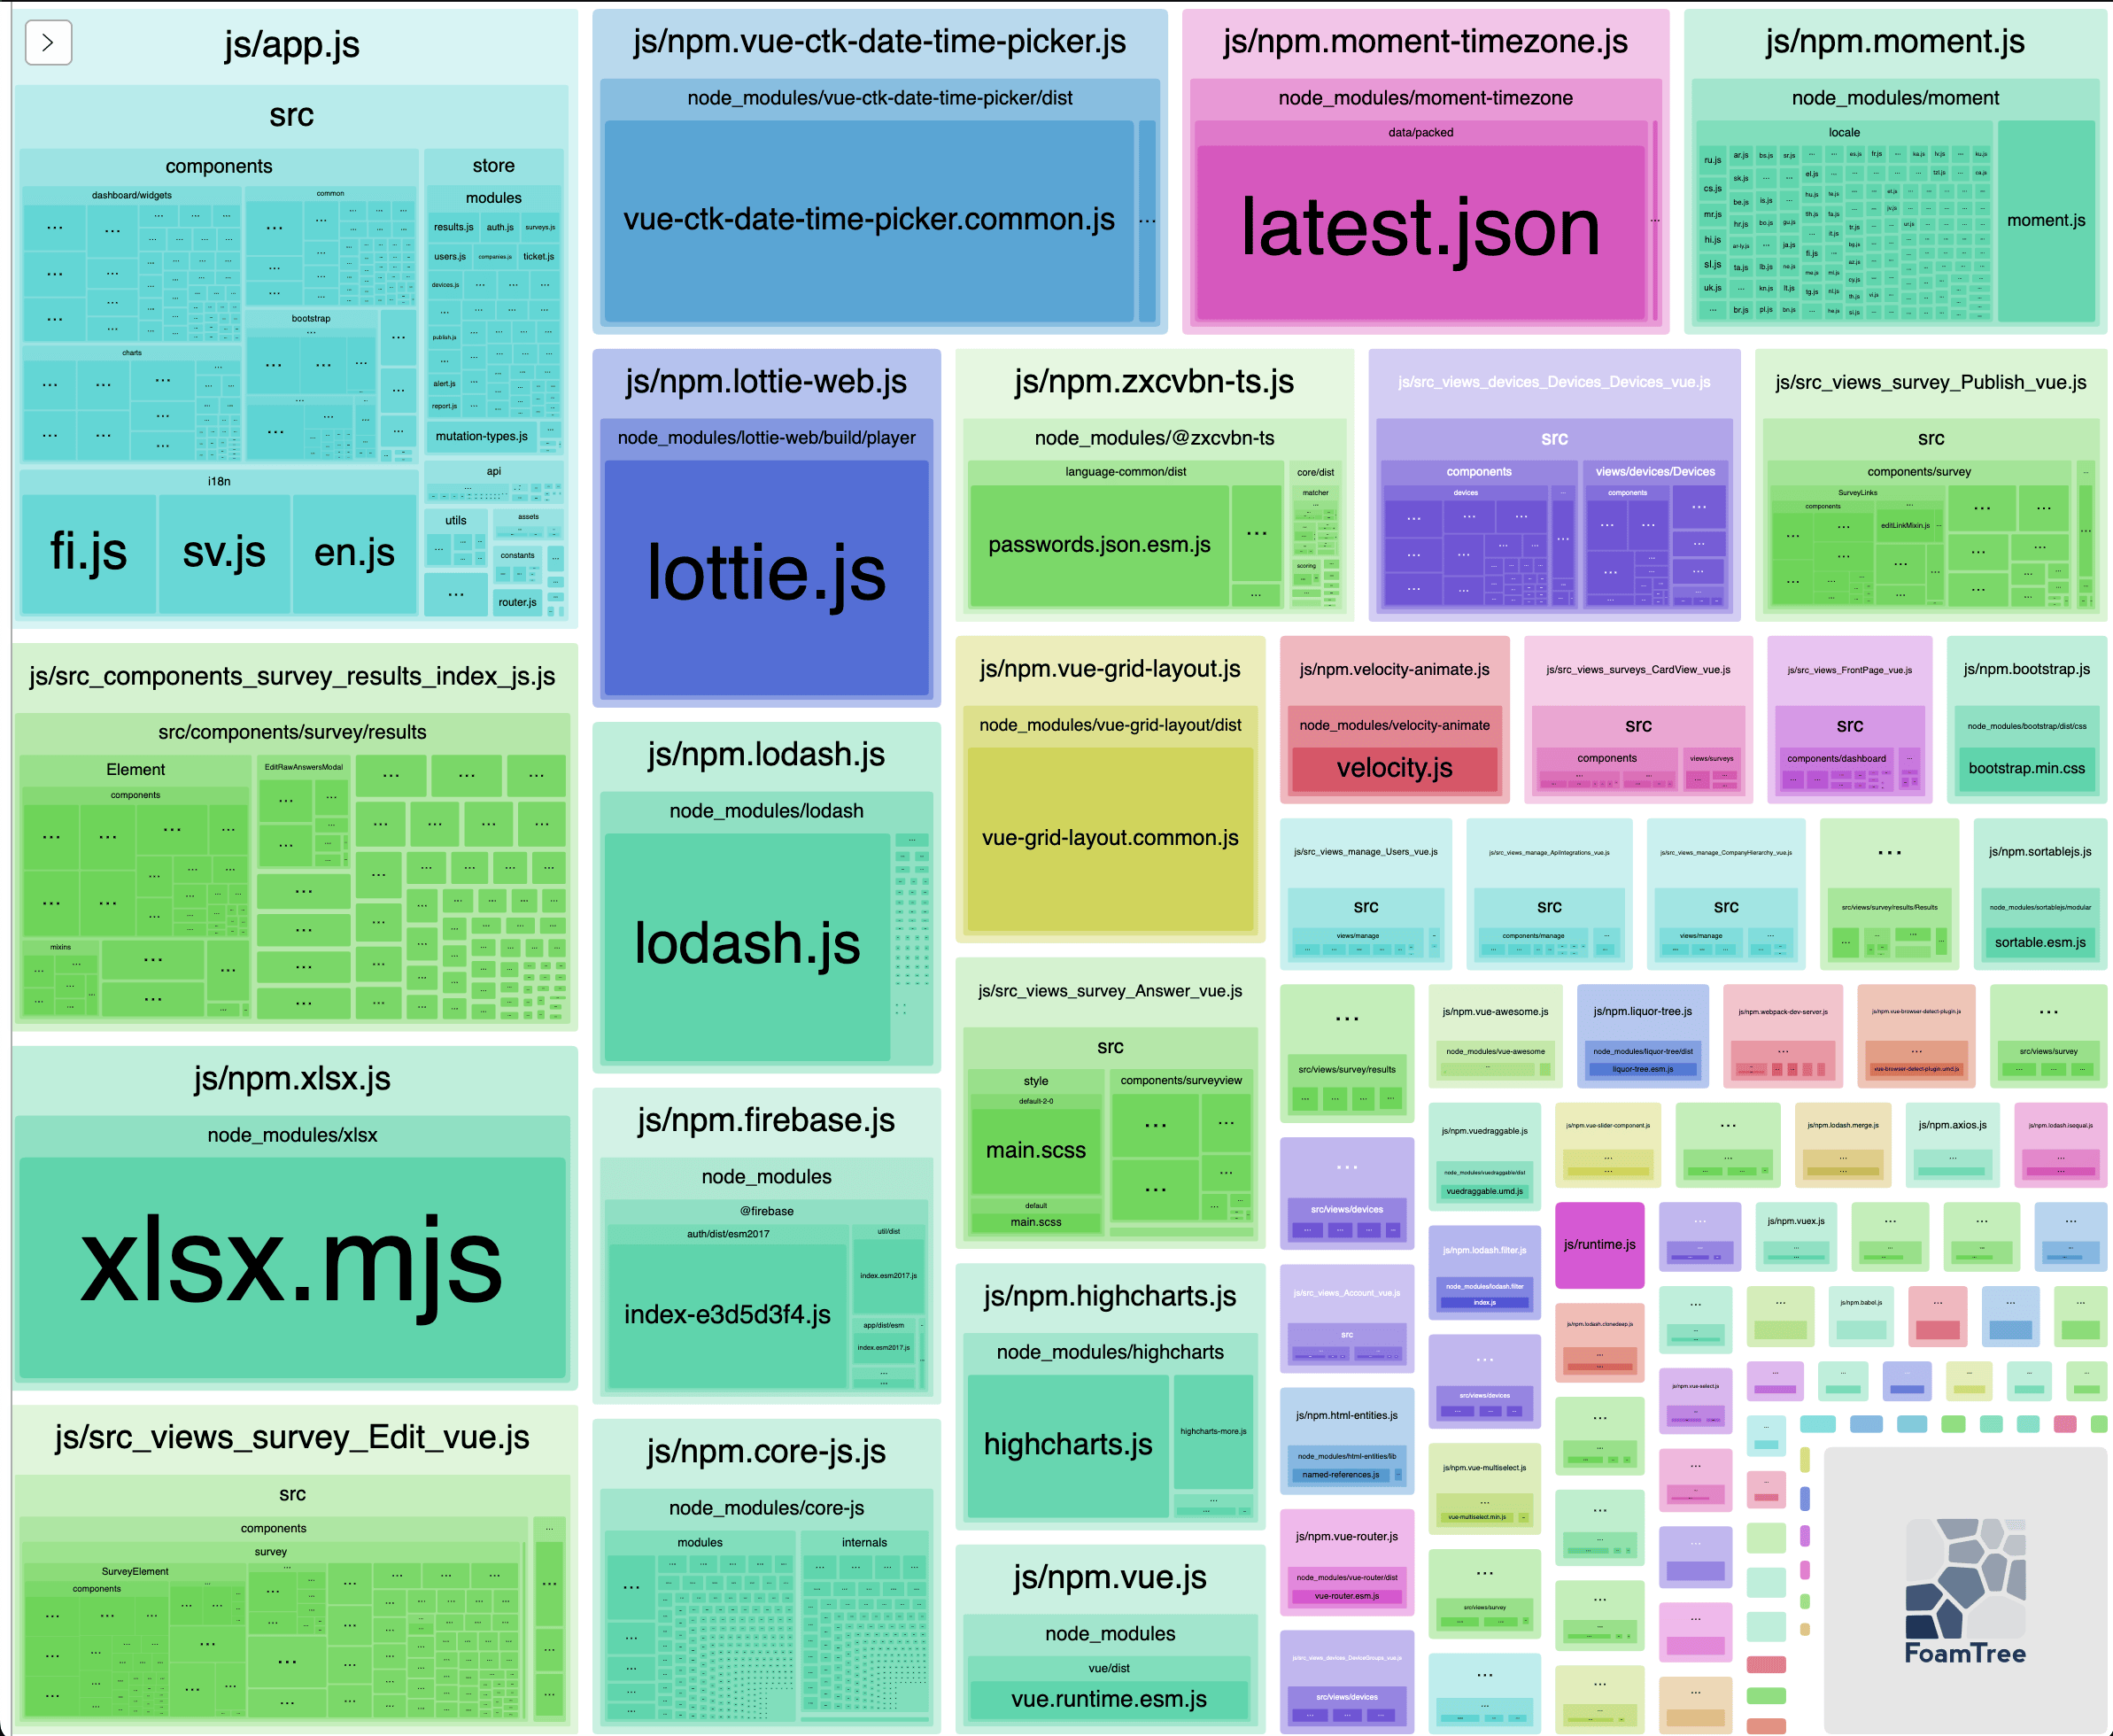
Analyzing Webpack bundles
Packaging your software can be done with different tools which bundles libraries and your code to groups of files (called chunks). Sometimes you might wonder why the chunks are so big and why some libraries are included although they are not used in some view (code splitting). There are different tools to analyze and visualize…